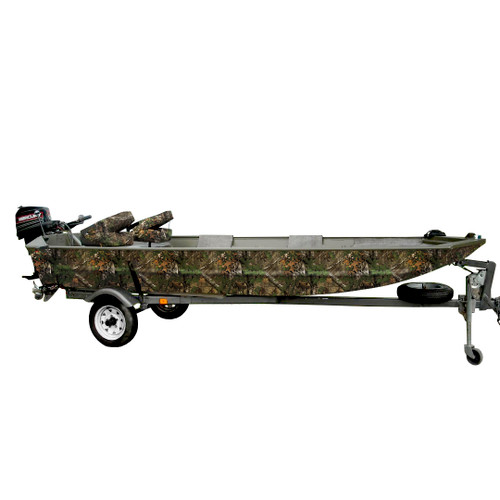
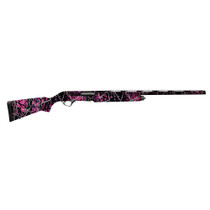
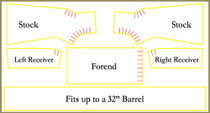
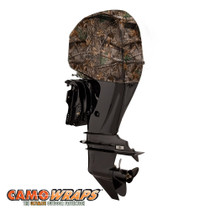
| NECESSARY TOOLS: |
Low-Tack Masking Tape – for positioning if laminate is not being used.
Felt Tip Squeegee – for applying vinyl.
Hobby Knife (OFLA or XACTO knife) – for trimming away excess vinyl.
Air Release Tool – for removing air bubbles.
Rivet Brush (Soft Brush) – for installing over rivets.
Heat Gun – for heating vinyl on complicated installations. |
| BEFORE GRAPHIC INSTALLATION: |
The first step in any successful application is cleaning your project before Installation.
For a boat wrap, the day before application, the boat should be taken to a car wash that uses brushes. Manual cleaning is not recommended.
After the boat is washed, thoroughly inspect the surface and edges for any remaining wax, polish, grease or grime.
Any such substance must be removed using industrial cleaners or silicone detergents (Isopropyl Alcohol will not do the trick). Using two cloths (one dry, one with Solvent) one in each hand, wipe the solvent on with the wet towel and then off with the dry one. This is to keep the solvent from drying onto the surface. CAUTION: Before using any solvent on a boat, be sure to test in an inconspicuous area to ensure the solvent won’t damage the boat’s paint.
A final cleaning should be done with Isopropyl Alcohol to clean away any impurities that could hinder the adhesive using the same two hand, two cloth method as mentioned above.
The next step is to remove any parts that may hamper the application such as Trims & Logos. Check and clean the covered surfaces as described above.
It is very important to allow the boat to dry completely. It can take up to 24 hours for a boat to dry fully, when in humid or cold conditions, which may mean allowing the boat to dry indoors overnight before applying. |
| RECOMMENDED INSTALLATION CONDITIONS: |
Whenever possible, try to apply graphics indoors in a controlled environment, such as a covered car bay or garage. Doing so will not only help you control the temperature (ideally between 70°F and 80°F), but also reduce the amount of wind, dust and other contaminates that may hinder the install process. Make sure your bay or garage is as clean as possible from dust or debris that may happen to circulate during your install (mop floor and dust with a damp cloth) before bringing in the surface for the vinyl application.
If you must do your install outside, grab a friend and choose a non-windy day that is between 60°F and 90°F, with a surface temperature over 45°F (use water to cool surface) to insure the adhesive bond forms correctly. |
| WARNINGS & PRECAUTIONS: |
- This product may require the use of heat to properly adhere to the boat. Use extreme caution when using heat so not to burn through the vinyl creating an un-repairable tear in the graphic. Make sure you always keep the heat moving evenly and wait until vinyl has cooled to finish trimming.
- This product requires trimming with a sharp razor blade. Use extreme caution when using sharp objects as they can cause severe injury. Take extreme care not to damage any surrounding area of the boat when trimming the vinyl.
- Excessive Heat and/or Cold temperature exposure will reduce the life of the adhesive.
- Make sure there is at least ½” of overlap at all seems to allow for shrinkage without exposing the raw edges of the material or possibly the boat.
|
| HOW TO INSTALL YOUR CAMOUFLAGE KIT: |
- VERY IMPORTANT: When performing a boat wrap you should start with the back of the boat first, then work your way to the front. This ensures that when you are driving the boat, the wind will not peel up the installed graphic.
- For best results use pieces that are more suitable and comfortable for you to handle.
- Cut pieces to fit the area you are covering and allow for extra material around the edges so you can trim off any excess.
- Position the graphic to be applied and secure it to the boat with small pieces of masking tape, making sure the graphic rises at least two inches past the edge of where the graphic is to be applied.
- Lift the graphic from one side, slowly remove the backing paper from the graphic and stretch it equally over the part to be wrapped. (For larger prints, you may only want to remove half of the backing and lay the graphic up to it, and then proceed with the rest of the graphic.)
- Apply the graphic with a felt tip squeegee, using short swipes that overlap the previous swipe. (For rounded surfaces such as wings and tightly curved panels, work small sections at a time using a heat gun to evenly heat the film. Cut and fold edges ONLY after it has cooled.)
- In order to conform Camouflage Vinyl around curves, bends or raised areas, use the edge of the squeegee to push the vinyl out at about 1/8 of an inch at a time using an arching motion, sort of like a windshield wiper. Once you have gone as far as you can go- you’ll begin to see “pinches” and stress in the vinyl, while keeping the graphic taught, apply some heat with a hairdryer or heat gun. Just start with a little heat. Heat causes the vinyl to soften which allows for more play and pliability. Your thumb works very well in these situations as does a sock or soft cloth over the edge of your squeegee. You do not want a hard plastic edge scratching the graphic. It can’t be stressed enough about going slow, squeegeeing in very small increments when installing dry over curves and stopping immediately and backing up if you see a problem area occurring. When applying heat make sure not to over stretch the vinyl as it will crack, fade, or wrinkle.
- Trimming you graphic correctly is the most important part of the install, so pay extra attention to detail when performing this task. To avoid shrinking of the film or mechanical wear on the open cutting edge (through cleaning brushes, wind, etc.) make sure to not cut graphic flush with boat edges.
- Remove any elements, such as mirrors or wiper blades that would force you to make extra cuts or unnecessary marks in the vinyl.
- IMPORTANT: any deep-drawn areas, borders and edges, should be carefully re-heated with a heat gun in order to quickly activate the adhesive. Move heat gun constantly to avoid damage to the graphic.
- When the wrapping is finished, if necessary, re-heat all borders, edges and corrugations again with a heat gun.
- If you notice any tiny air bubbles under the graphic, don’t panic – remaining tiny air bubbles under the graphic will diffuse through the vinyl within a few days depending on the ambient temperature. Only larger bubbles should be slightly punctured by an air release tool and the air squeezed out with a squeegee.
- Unpainted Plastic Parts:
- Be careful when applying the film to unpainted plastic parts of the boat. If in doubt, use the water drop test. If the water continues to run off in drops after the cleaning procedure described above, it is not advisable to apply the graphic. If the water runs off without marked drop formation, the graphic can be applied to the plastic surface. In any case, such surface should also be completely smooth since no graphic will stick to a structured surface for long.
|
CAMOUFLAGE
CARE TIPS: |
Use soap and water to clean graphics. Do Not use a pressure washer on graphics as this can cause them to rip and peel away. Do Not use petroleum based cleaners or spill gas on graphics as this can cause them to fade or change color completely. Do Not wax the graphics; it will only cause damage to them. |
| HOW TO REMOVE: |
This product can be easily removed by starting at any corner and pealing the graphic away from the boat on a downward angle. If the product is stuck very well, you may use a plastic scraper to get between the graphic and the boat to assist in the removal process. It also helps to let the boat graphic heat up in sun before removing. Once the entire product is removed, use a citrus based solvent to remove any excess adhesive from the surface.
| NECESSARY TOOLS: |
Low-Tack Masking Tape – for positioning if laminate is not being used.
Felt Tip Squeegee – for applying vinyl.
Hobby Knife (OFLA or XACTO knife) – for trimming away excess vinyl.
Air Release Tool – for removing air bubbles.
Rivet Brush (Soft Brush) – for installing over rivets.
Heat Gun – for heating vinyl on complicated installations. |
| BEFORE GRAPHIC INSTALLATION: |
The first step in any successful application is cleaning your project before Installation.
For a boat wrap, the day before application, the boat should be taken to a car wash that uses brushes. Manual cleaning is not recommended.
After the boat is washed, thoroughly inspect the surface and edges for any remaining wax, polish, grease or grime.
Any such substance must be removed using industrial cleaners or silicone detergents (Isopropyl Alcohol will not do the trick). Using two cloths (one dry, one with Solvent) one in each hand, wipe the solvent on with the wet towel and then off with the dry one. This is to keep the solvent from drying onto the surface. CAUTION: Before using any solvent on a boat, be sure to test in an inconspicuous area to ensure the solvent won’t damage the boat’s paint.
A final cleaning should be done with Isopropyl Alcohol to clean away any impurities that could hinder the adhesive using the same two hand, two cloth method as mentioned above.
The next step is to remove any parts that may hamper the application such as Trims & Logos. Check and clean the covered surfaces as described above.
It is very important to allow the boat to dry completely. It can take up to 24 hours for a boat to dry fully, when in humid or cold conditions, which may mean allowing the boat to dry indoors overnight before applying. |
| RECOMMENDED INSTALLATION CONDITIONS: |
Whenever possible, try to apply graphics indoors in a controlled environment, such as a covered car bay or garage. Doing so will not only help you control the temperature (ideally between 70°F and 80°F), but also reduce the amount of wind, dust and other contaminates that may hinder the install process. Make sure your bay or garage is as clean as possible from dust or debris that may happen to circulate during your install (mop floor and dust with a damp cloth) before bringing in the surface for the vinyl application.
If you must do your install outside, grab a friend and choose a non-windy day that is between 60°F and 90°F, with a surface temperature over 45°F (use water to cool surface) to insure the adhesive bond forms correctly. |
| WARNINGS & PRECAUTIONS: |
- This product may require the use of heat to properly adhere to the boat. Use extreme caution when using heat so not to burn through the vinyl creating an un-repairable tear in the graphic. Make sure you always keep the heat moving evenly and wait until vinyl has cooled to finish trimming.
- This product requires trimming with a sharp razor blade. Use extreme caution when using sharp objects as they can cause severe injury. Take extreme care not to damage any surrounding area of the boat when trimming the vinyl.
- Excessive Heat and/or Cold temperature exposure will reduce the life of the adhesive.
- Make sure there is at least ½” of overlap at all seems to allow for shrinkage without exposing the raw edges of the material or possibly the boat.
|
| HOW TO INSTALL YOUR CAMOUFLAGE KIT: |
- VERY IMPORTANT: When performing a boat wrap you should start with the back of the boat first, then work your way to the front. This ensures that when you are driving the boat, the wind will not peel up the installed graphic.
- For best results use pieces that are more suitable and comfortable for you to handle.
- Cut pieces to fit the area you are covering and allow for extra material around the edges so you can trim off any excess.
- Position the graphic to be applied and secure it to the boat with small pieces of masking tape, making sure the graphic rises at least two inches past the edge of where the graphic is to be applied.
- Lift the graphic from one side, slowly remove the backing paper from the graphic and stretch it equally over the part to be wrapped. (For larger prints, you may only want to remove half of the backing and lay the graphic up to it, and then proceed with the rest of the graphic.)
- Apply the graphic with a felt tip squeegee, using short swipes that overlap the previous swipe. (For rounded surfaces such as wings and tightly curved panels, work small sections at a time using a heat gun to evenly heat the film. Cut and fold edges ONLY after it has cooled.)
- In order to conform Camouflage Vinyl around curves, bends or raised areas, use the edge of the squeegee to push the vinyl out at about 1/8 of an inch at a time using an arching motion, sort of like a windshield wiper. Once you have gone as far as you can go- you’ll begin to see “pinches” and stress in the vinyl, while keeping the graphic taught, apply some heat with a hairdryer or heat gun. Just start with a little heat. Heat causes the vinyl to soften which allows for more play and pliability. Your thumb works very well in these situations as does a sock or soft cloth over the edge of your squeegee. You do not want a hard plastic edge scratching the graphic. It can’t be stressed enough about going slow, squeegeeing in very small increments when installing dry over curves and stopping immediately and backing up if you see a problem area occurring. When applying heat make sure not to over stretch the vinyl as it will crack, fade, or wrinkle.
- Trimming you graphic correctly is the most important part of the install, so pay extra attention to detail when performing this task. To avoid shrinking of the film or mechanical wear on the open cutting edge (through cleaning brushes, wind, etc.) make sure to not cut graphic flush with boat edges.
- Remove any elements, such as mirrors or wiper blades that would force you to make extra cuts or unnecessary marks in the vinyl.
- IMPORTANT: any deep-drawn areas, borders and edges, should be carefully re-heated with a heat gun in order to quickly activate the adhesive. Move heat gun constantly to avoid damage to the graphic.
- When the wrapping is finished, if necessary, re-heat all borders, edges and corrugations again with a heat gun.
- If you notice any tiny air bubbles under the graphic, don’t panic – remaining tiny air bubbles under the graphic will diffuse through the vinyl within a few days depending on the ambient temperature. Only larger bubbles should be slightly punctured by an air release tool and the air squeezed out with a squeegee.
- Unpainted Plastic Parts:
- Be careful when applying the film to unpainted plastic parts of the boat. If in doubt, use the water drop test. If the water continues to run off in drops after the cleaning procedure described above, it is not advisable to apply the graphic. If the water runs off without marked drop formation, the graphic can be applied to the plastic surface. In any case, such surface should also be completely smooth since no graphic will stick to a structured surface for long.
|
CAMOUFLAGE
CARE TIPS: |
Use soap and water to clean graphics. Do Not use a pressure washer on graphics as this can cause them to rip and peel away. Do Not use petroleum based cleaners or spill gas on graphics as this can cause them to fade or change color completely. Do Not wax the graphics; it will only cause damage to them. |
| HOW TO REMOVE: |
This product can be easily removed by starting at any corner and pealing the graphic away from the boat on a downward angle. If the product is stuck very well, you may use a plastic scraper to get between the graphic and the boat to assist in the removal process. It also helps to let the boat graphic heat up in sun before removing. Once the entire product is removed, use a citrus based solvent to remove any excess adhesive from the surface. |
|


